Autonomous Creation
Instantly create external distribution hubs from the UI without requiring database or technical support intervention.
External Distribution Centers (also known as Exo-Warehouses) allow you to autonomously register, manage, and configure third-party suppliers or external warehouse locations directly within your ShipEdge OMS. Rather than contacting support to configure dropshippers, you can now structure your multi-hub fulfillment network on your own and visually track cross-network inventory.
Instantly create external distribution hubs from the UI without requiring database or technical support intervention.
Access routing parameters, inventory uploads, and active quantity toggles from a unified Action menu per location.
Click on any SKU’s total availability to see a detailed modal displaying exactly how much inventory sits in each connected external Supplier.
Configure priority tags and crossdock triggers for external warehouses to automatically create purchase orders when stock depletes.
Before starting, ensure the External DC module is fully enabled in your account.
Navigate to Distribution Centers
Go to the main menu and select Inventory > Distribution Centers.
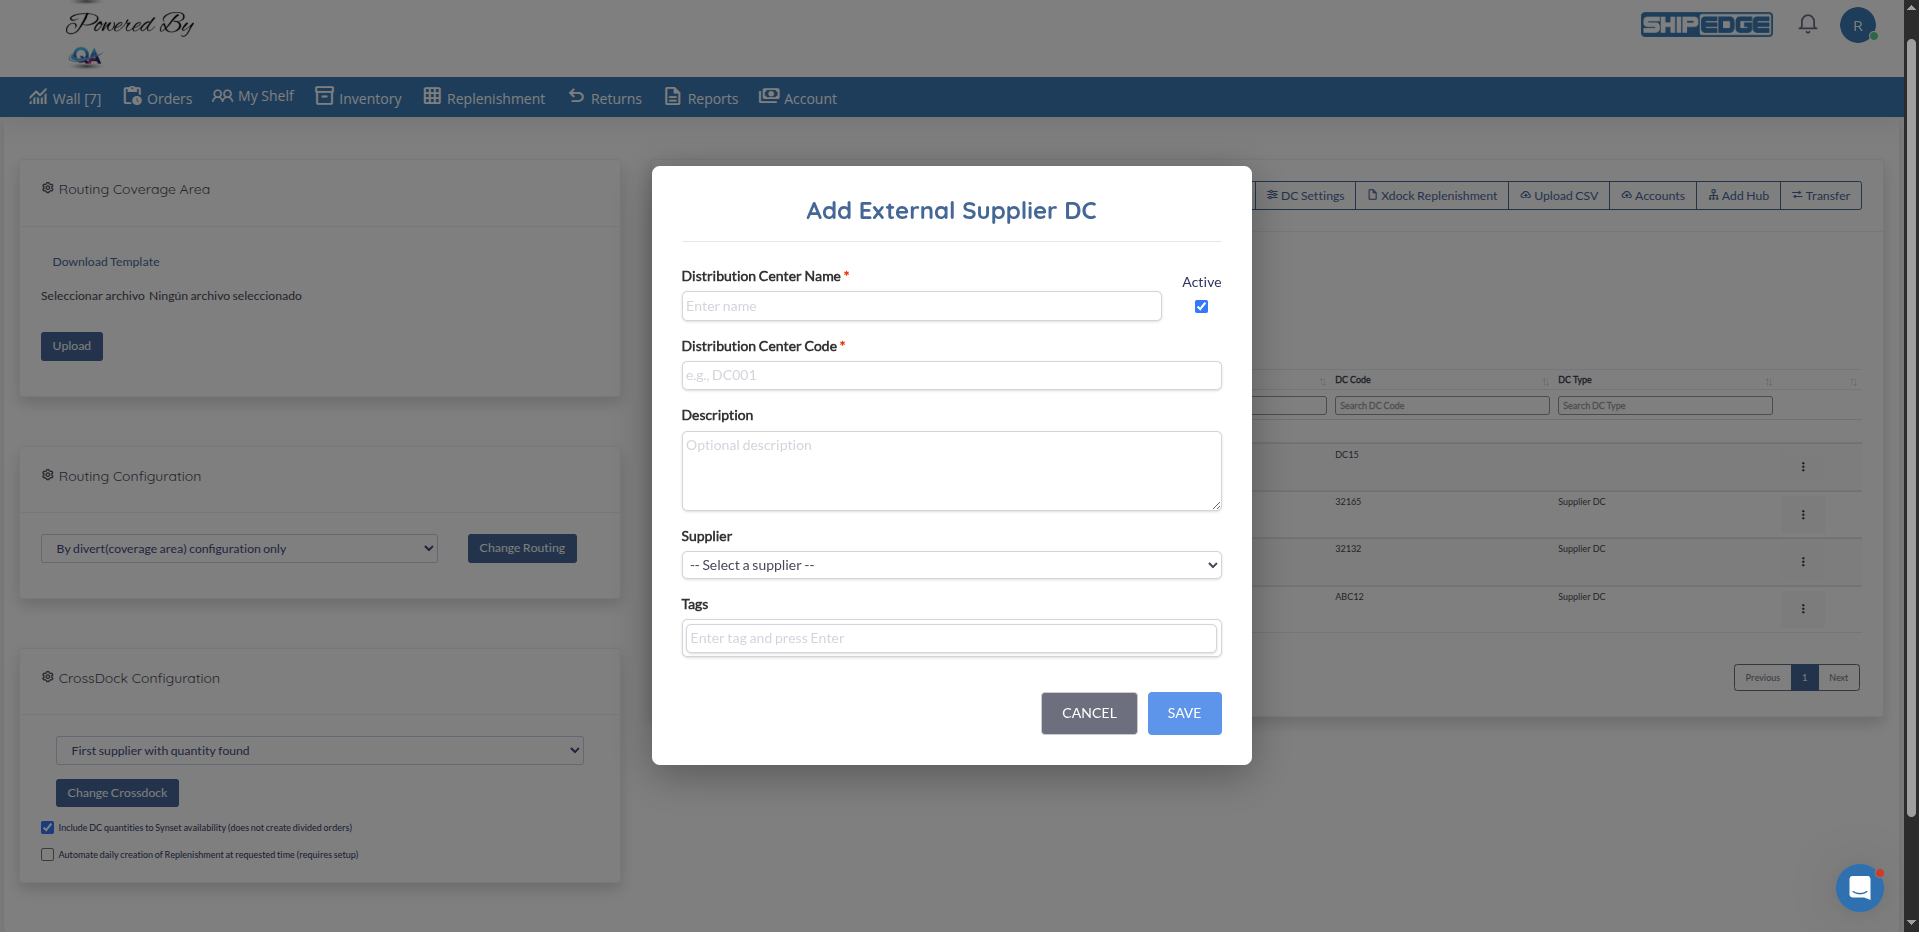
Open the Creation Modal
At the top of the grid, click the Add DC Supplier button.
Complete the Required Details
In the modal form, you must fill out:
Save the New Location
Click Save. The system will validate the fields and instantly create a custom distribution center record. The new external location will immediately appear in your Distribution Centers list.
All tools for managing the supplier hub have been centralized into an interactive action menu.
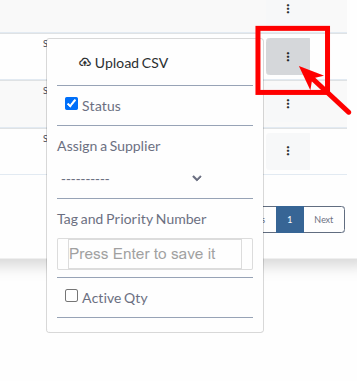
Open the Action Menu
Locate your External DC in the grid. Click the three-dot vertical icon (⋮) at the end of the row to open the menu.
Upload CSV (Update Inventory)
Use this option to bulk upload inventory levels for this specific DC. You can download the ExoWarehouse_template.csv, fill in the sku, qty, and cost, and upload it to update stock levels immediately.
Toggle Status
Use the Status checkbox within the menu to enable or disable the External DC record. If disabled, the center will not be considered for routing or inventory aggregation.
Assign a Supplier
Select the corresponding supplier from the Assign a Supplier dropdown. Linking an External DC to a core Supplier record is essential for correct inventory tracking and procurement workflows.
Configure Tags and Priorities
Use the Tag and Priority Number field to add routing tags (e.g., priority=1). These tags dictate how crossdocking and automatic replenishment logic prioritizes this supplier during order fulfillment.
Enable Active Quantities
Check the Active Qty box if you want this supplier’s inventory to be actively included in your Total Network Available sum across the system.
Once your External DCs are configured and stocked, you can perform deep-dive audits of your inventory across the entire fulfillment network using a three-level drill-down system.
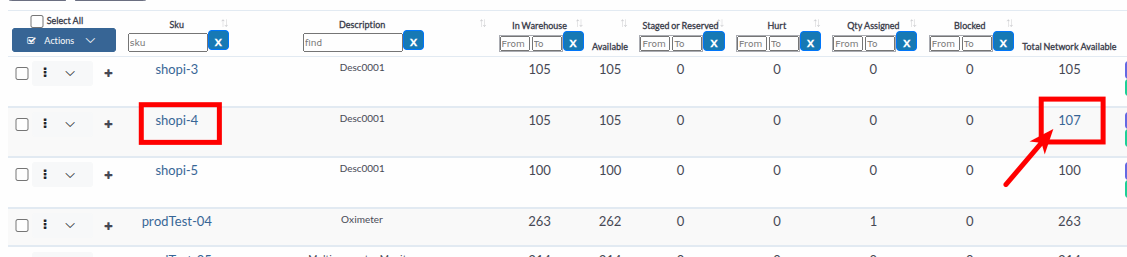
The primary view in the Inventory > Catalog provides a high-level sum of all inventory for a specific SKU.
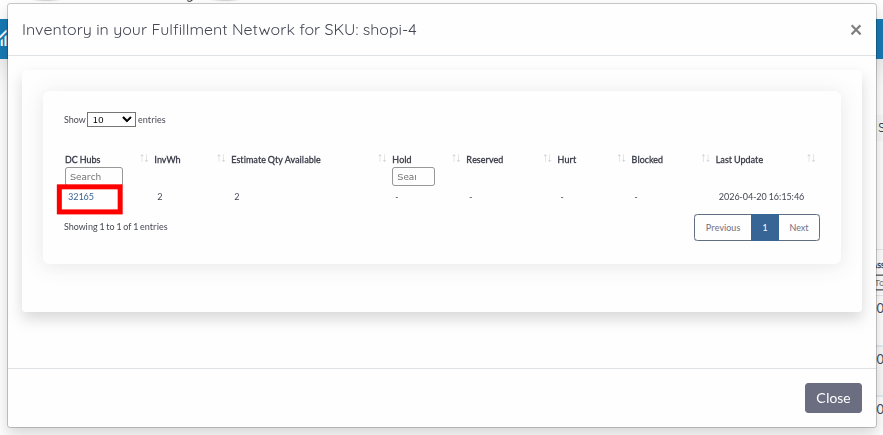
Clicking the total quantity opens the Inventory in your Fulfillment Network modal. This view provides a transparent breakdown of where your stock is physically located.
InvWh, Estimate Qty Available, Reserved, and Hurt.Hold or Blocked may be hidden to maintain privacy or focus on available stock.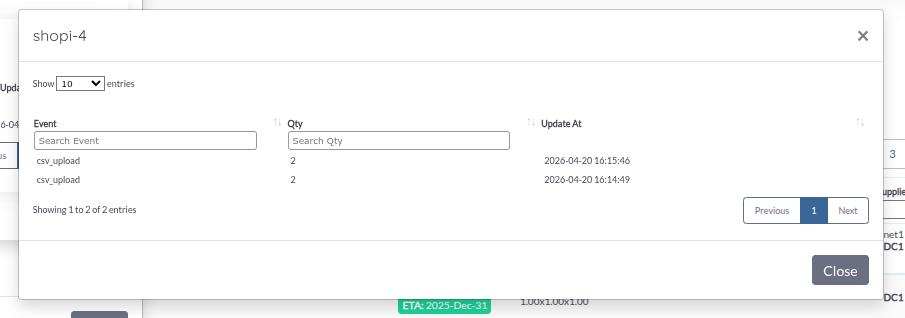
For the ultimate level of transparency, you can audit the specific ledger of any location within the network.
Select a Location
Inside the breakdown modal, click on the DC Name (it appears as a blue link).
Review Transaction History
A second modal, Transaction History, will open for that specific SKU and location.
Analyze Events
This modal displays a chronological list of every event that affected the inventory level, including:
Always ensure your SourceCode is unique across all your distribution centers to prevent saving errors and duplicated routing paths.
Problem: I cannot find the Upload CSV button in the Distribution Centers toolbar.
Solution:
exo_wh (External Warehouse) module is active for your account.Problem: After selecting a file and clicking Upload, the system displays a “Completed with errors” message.
Solution:
observation column for each failed row. Common issues include:
qty and cost columns must be numeric without currency symbols.dc_code must exactly match the unique code of your External DC.Problem: The three-dots menu (⋮) does not show options like “Assign a Supplier” or “Active Qty”.
Solution:
Problem: Clicking the Total Network Available quantity shows a breakdown with 0 units or an empty transaction history.
Solution:
Next Steps: Learn more about managing Suppliers