One Login for Multiple Apps
Use the same credentials across your organization’s apps. No need to remember a separate ShipEdge password if your company uses SSO.
SSO (Single Sign On) lets you log in to ShipEdge using your SSO credentials. Instead of a ShipEdge username and password, you sign in through a popup window. If your account is linked to SSO, you must use this method to log in.
When you use SSO for the first time, the system may ask you to link your existing ShipEdge account or register a new one. This page explains the full flow.
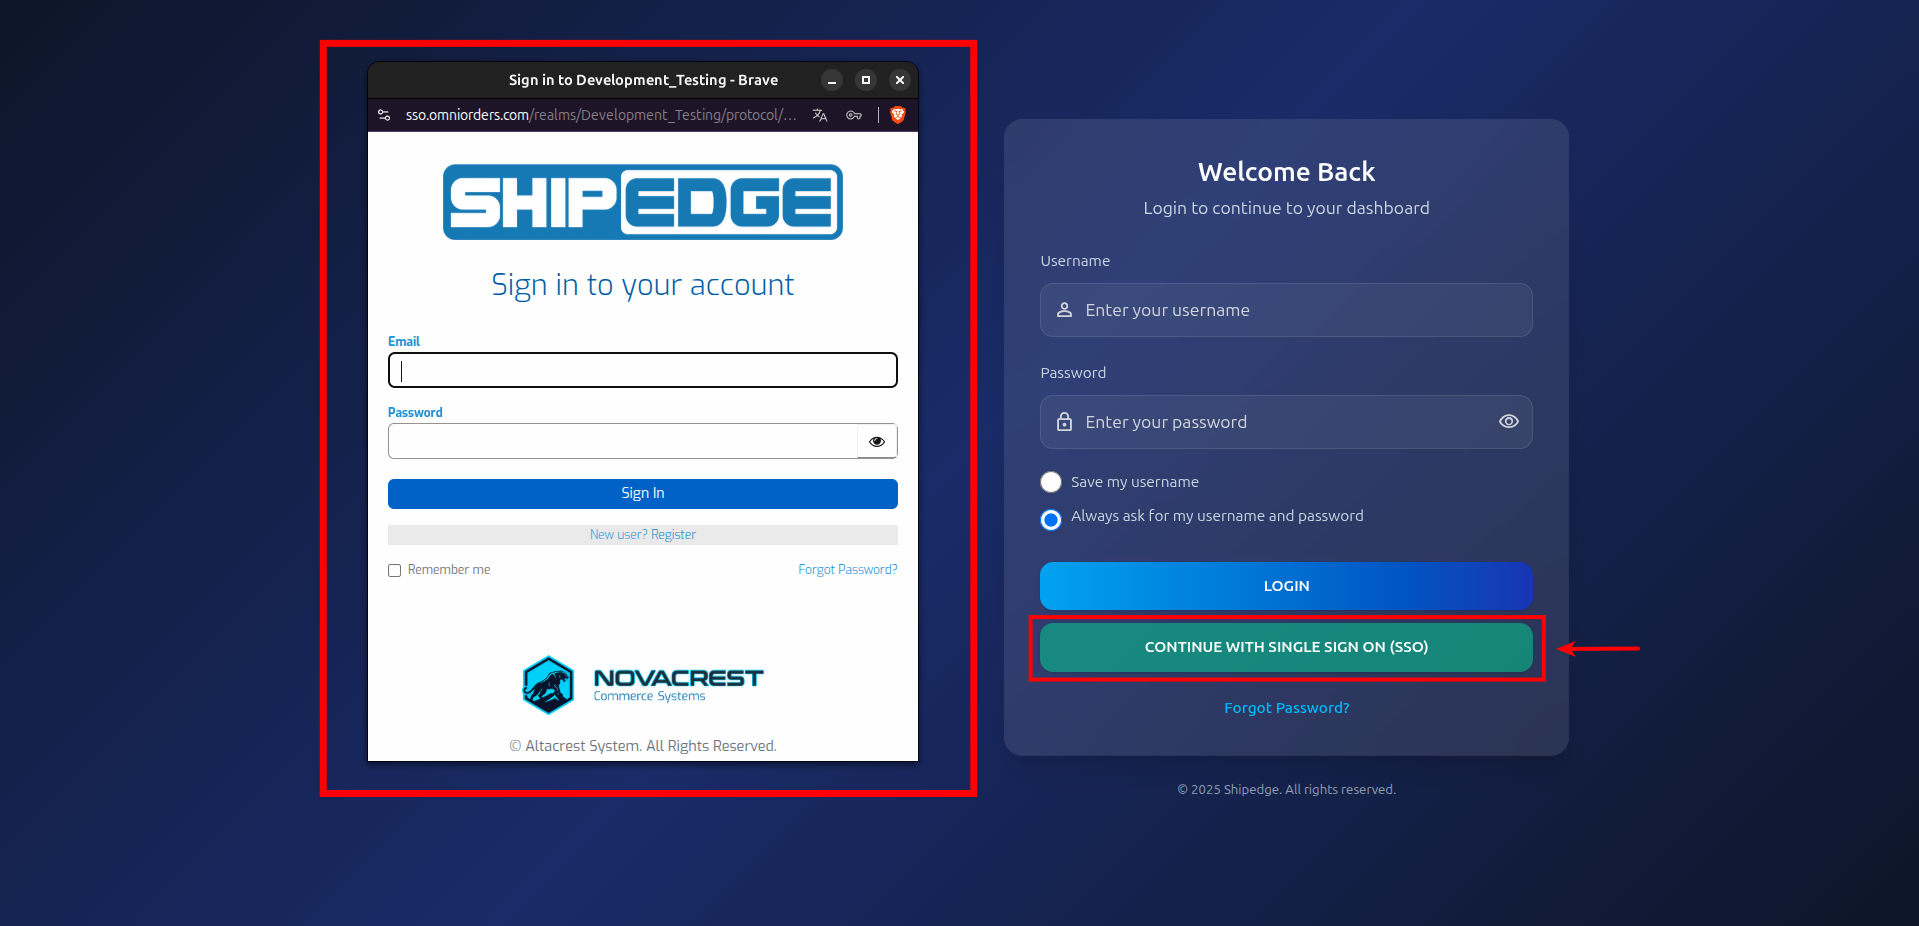
SSO login acts as the authentication server. When you click CONTINUE WITH SINGLE SIGN ON (SSO) on the login page, a popup opens where you enter your SSO credentials. After you sign in, ShipEdge links your session to your account.
If your ShipEdge account is already linked to SSO (your user has an SSO identity), you cannot use the standard username/password login. You must use SSO.
Use the same credentials across your organization’s apps. No need to remember a separate ShipEdge password if your company uses SSO.
Your organization manages passwords and security policies. The identity provider handles authentication securely.
Link your existing ShipEdge account to your SSO identity once. After that, SSO login signs you in automatically.
New users can register through SSO. The system creates a ShipEdge account linked to your SSO identity.
On the ShipEdge login page, click the CONTINUE WITH SINGLE SIGN ON (SSO) button. A popup window opens. Complete the sign-in in that window.
Go to the Login Page
Open the ShipEdge login page. You see two buttons: LOGIN (for username/password) and CONTINUE WITH SINGLE SIGN ON (SSO). You also see a Forgot Password? link.
Click CONTINUE WITH SINGLE SIGN ON (SSO)
A popup window opens with your organization’s SSO login form (Email, Password, and Sign In button).
If you do not have an SSO account yet: Click Register
On the SSO login screen, you see “New user? Register” below the Sign In button. If you are a new user and do not have SSO credentials, you must click Register to create your SSO account first. Complete the registration form, then click in the Register button.
Choose whether you have a ShipEdge account
The next screen asks: Do you already have a Shipedge account?
When you sign in with SSO for the first time (or when the system needs to confirm your identity), you see a User Information screen showing:
You also see two buttons:
The next screen asks: Do you already have a Shipedge account?
You see two options:
If you choose Yes, I have an account, you see a form with:
Click Sign In to link your account. If the username and password are correct, your ShipEdge account is linked to your SSO identity. You are then logged in.
Click Back to return to the previous screen. If you do not have an account, click Create new account to go to the registration flow.
If you choose No, create new account, you are redirected to the SSO registration page. Complete the registration form to create a new ShipEdge account linked to your SSO identity.
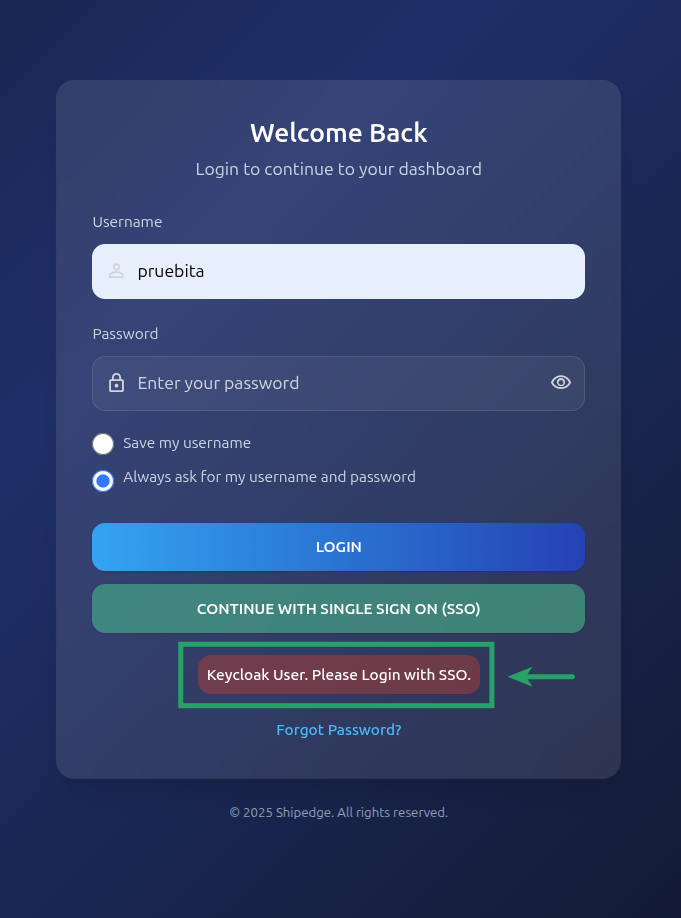
If your ShipEdge account is linked to SSO and you try to log in with username and password, you see the message: SSO Account Detected. Please use the Single Sign-On button.
The system may automatically open the SSO login popup after a short delay. Use CONTINUE WITH SINGLE SIGN ON (SSO) to log in.
If your SSO email is linked to more than one ShipEdge account, the Account Selection screen acts as your central hub. It allows you to easily view and access all your connected accounts (OMS and WMS) from one place, eliminating the need to remember multiple passwords or sign in multiple times.
When you log in via SSO:
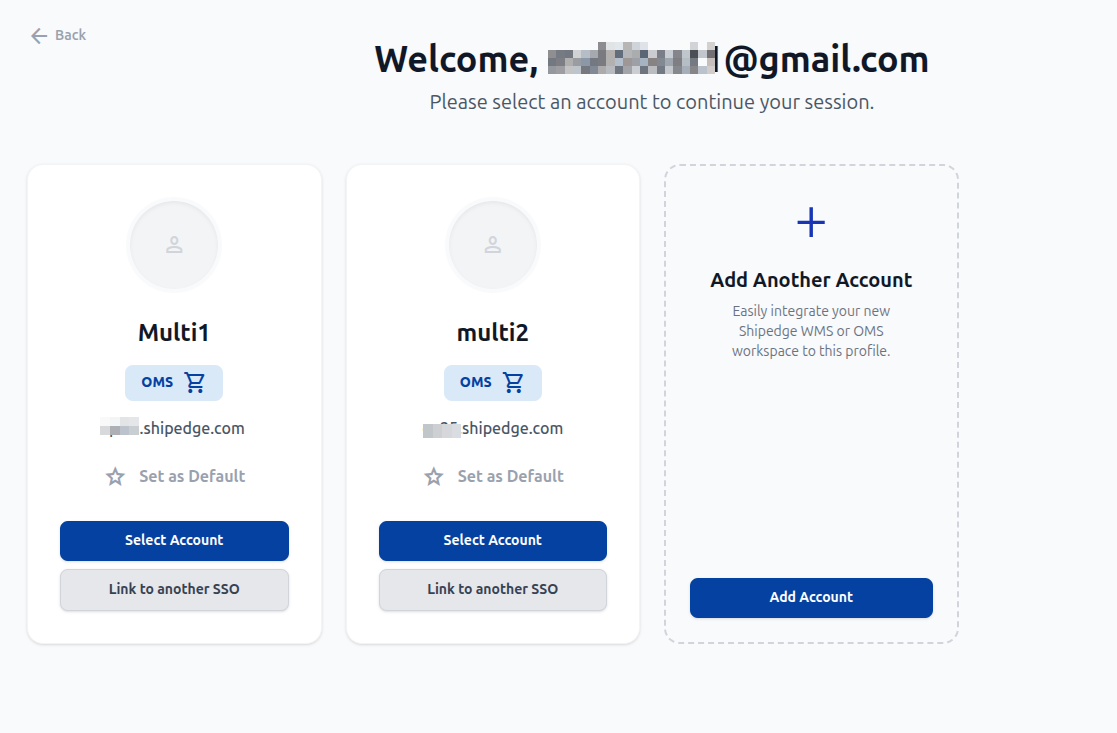
The Account Selection screen displays a “card” for each of your linked accounts, showing the Username, System Type (OMS or WMS), and the environment URL.
Access the Account Selection Screen
Select an account
Click on the card of the account you want to access for your current session.
Set a Default Account (Optional)
You can mark an account as your default. Future logins will automatically bypass this selection screen and log you directly into that account.
If you already use SSO but need to link another existing ShipEdge account (or create a new one) to your current SSO email:
Access the Account Selection Screen
This screen appears automatically after you log in. If you are already logged in, you can access it by clicking your profile menu at the top right and selecting My Accounts.
Click on the Add Account card
This will open a new modal.
Link or create the account
Choose to create a new OMS account or enter the username and password of an existing ShipEdge account (OMS or WMS). Once verified, the new account must be activated by the administrator.
Note: The creation tool within “Add Account” is exclusively for new OMS accounts. If you need a new WMS account, please contact ShipEdge support.
If you need to disconnect an account from your current SSO email and link it to a different one:
Click Link to another SSO
On the Account Selection Screen, click the Link to another SSO button. A warning modal will appear confirming that you want to disconnect the current user.
Confirm disconnection
Click Disconnect and Link New Account. You will be redirected to the SSO login page.
Sign in with new credentials
Sign in with the new SSO email credentials. If successful, the ShipEdge account will be permanently linked to the new SSO email.
Keep the following limitations in mind when managing multiple accounts via SSO:
Enable popups for the ShipEdge site so the SSO window can open. Blocked popups prevent SSO login.
Link your ShipEdge account to SSO the first time you use it. After that, SSO login signs you in without extra steps.
When linking an existing account, use your ShipEdge username and password. These are different from your SSO credentials.
If you see “Could not verify SSO user” or other errors, try again. If the issue persists, contact support.
Problem: You entered your username and password but see the message SSO Account Detected. Please use the Single Sign-On button.
Solution: Your account is linked to SSO. You must use CONTINUE WITH SINGLE SIGN ON (SSO) to log in. The system may open the SSO popup automatically; if not, click the SSO button.
Problem: This exact message appears after you sign in with SSO.
Solution: There may be a temporary issue with the SSO connection. Try again. If it keeps happening, contact support.
Problem: Nothing happens when you click the SSO button.
Solution: Your browser may be blocking the popup. Allow popups for the ShipEdge domain in your browser settings, then try again.
Problem: You see these errors when trying to link your account.
Solution: Fill in both Username and Password before clicking Sign In. Both fields are required.
Problem: You see this message when trying to link your existing ShipEdge account to SSO.
Solution: Check that your username and password are correct. The account must not already be linked to another SSO identity. If the problem continues, contact support.
Problem: You see an “Account Linking Error” popup with this exact message when trying to link an account.
Solution: This error occurs when the ShipEdge account you are trying to link is already connected to a different SSO email. A ShipEdge account can only be owned by one SSO email at a time. To resolve this, you must either log in using the SSO email that originally linked the account, or contact an administrator to unlink the account so it can be associated with your new email.
Problem: During registration, you see a message about username or email already in use.
Solution: The message suggests using Link My Register Account to connect your existing account. If you already have a ShipEdge account, go back and choose Yes, I have an account when asked “Do you already have a Shipedge account?” Then enter your username and password to link it.
Problem: Registration through SSO did not complete.
Solution: There may be a conflict with your email or username in your organization’s identity provider. Try a different email or use Link My Register Account or Link My Existing Account (depending on the message) to connect your existing account. If the problem continues, contact support.
Next Steps: